Tag Archives: Wireless sensor network

Setting up Cooja: A simulator for TinyOS

It might not be possible to test out all the work you do in TinyOS on a physical test bench at all times. Or maybe sometimes you want to save yourself the trouble of flashing a large number of motes only to realize that you’d made trivial errors in your code. Enter: Cooja.

Contiki is another widely used platform in the field of Wireless Sensor Networks. We’ll now be describing how to setup Cooja: the simulator tool offered by Contiki.

The normal installation is by following the instructions on this site:
http://www.contiki-os.org/start.html

However, for somebody who just wants to use Cooja as a simulation platform in conjunction with TinyOS, the normal setup is bulky at a little over 2 GB to download and the instructions are something that even we struggled with.

In order to save you the trouble of this procedure, we’ve uploaded the relevant part of Contiki to make Cooja.

Steps:

1. Download the .zip file from https://docs.google.com/file/d/0Byj9l1T-DECtRGd2a1Vka1RUakk/edit
2. Extract the files to any convenient location.
3. Make sure you have java development kit (7 or greater) and ant installed on your system. If not, then :

                    sudo apt-get install ant (on Linux)  or https://ant.apache.org/manual/install.html (for Windows)

http://www.oracle.com/technetwork/java/javase/downloads/index.html (for Windows)
or sudo apt-get install openjdk-7-jdk (for Linux)

4.Set the path variables for java and ant (only required if not automatically set or in windows)
5.Go to the location where you’ve extracted the folder.
6.Navigate to contiki/tools/cooja
7.Write ant run (in terminal or cmd)

This should launch the simulator and you can now explore Cooja.

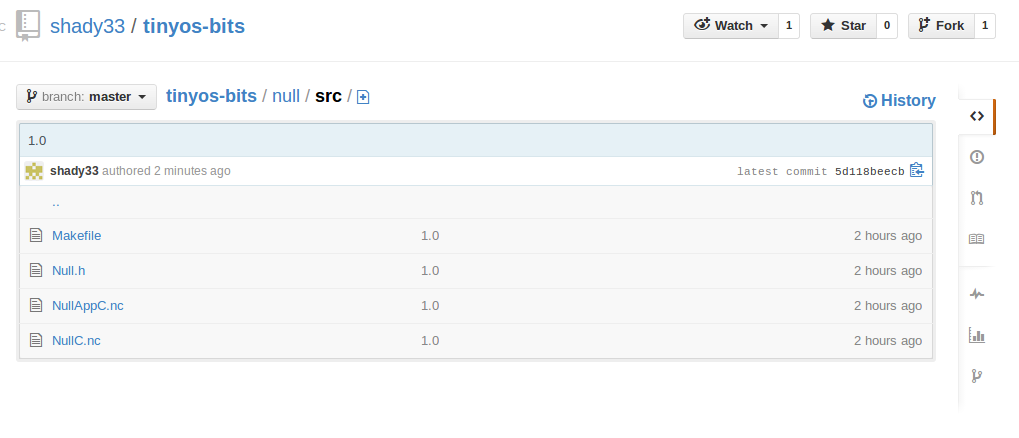
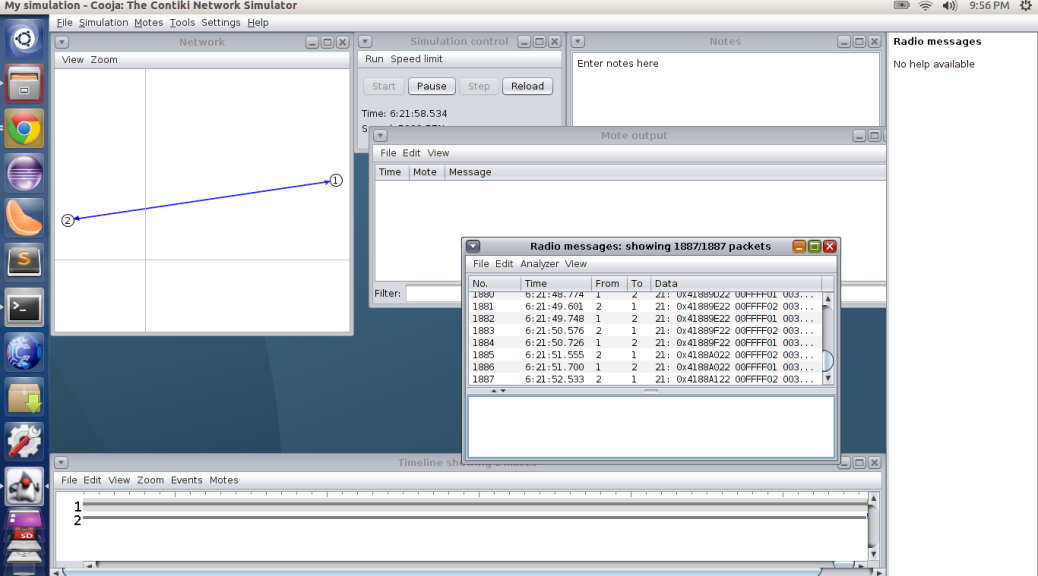
The example we’re going to show here is simple radio communication between two motes and from our basic Send Receive code hosted at:

https://github.com/shady33/tinyos-bits/tree/master/basic_send_receive

General Steps for simulating code based on TelosB motes:
1. File->New Simulation. Create.

2.Motes->Add Motes->Create a new mote type->Sky Mote

3.In the Contiki Process/Firmware field browse to the location on disk where you’ve compiled your code using make telosb

4.Go to build/telosb/ and choose main.exe

5.Add motes

6.Press Start in the simulation control panel

That’s about it. Some of the other common features we use are:

1. The on board LEDs which you can add from View->LEDs in the Network Window.
2. Radio Messages from Tools->Radio Messages
3.Speed Limit control in the Simulation Control window
4.The output of Printf statements that show up in the Mote Output Window
(Something to watch out for while using Printf statements, its better to use the SerialPrintfC component in the configuration file XYZAppC.nc file while simulating in Cooja. On the other hand, PrintfC works better in real-world simulations using the java.net.tinyos.tools.listen tool for tinyos or something else like Cutecom.)

Cheers,
Mayank Joneja, Laksh Bhatia, Sachin

Getting Started with TinyOS-The Basics

The first thing an outsider needs to get familiar with is the structure of the program while coding in TinyOS. The official TinyOS tutorial does a great job of making all these basics clear, but I just thought we’d include this post as a token post in order to maintain some sort of order 😛 Feel free to check out the official post and all of their tutorials:

http://www.tinyos.net/nest/doc/tutorial/lesson1.html

Every-time you start a new project “xyz”, you’ll need at least 4 files.

  1. Makefile
  2. xyzC.nc file
  3. xyzAppC.nc file
  4. xyz.h file

Laksh has hosted all of our projects on github and I’ll keep referring to the relevant folders so that you could try out the codes as well. For instance we’ve called these skeletal files “null files” and you could have a look at them to understand the basic structure for any TOS project.

https://github.com/shady33/tinyos-bits/tree/master/null/src

A Makefile tells the compiler which flags to set and tells it where your main configuration file is present (xyzAppC.nc). We mainly use the Makefile to also declare the buffer size for the printf commands we use in our projects. One can also set the power level for communication for static range scenarios here.

xyzC.nc file contains your main code where you also declare all the interfaces of the mote (in our case, UC-Berkeley or TelosB or MicaZ) that you’ll be using. xyzAppC.nc is your main configuration file and interfaces your main code with the hardware modules like LEDs, timers, radio module, sensors etc. 

The header file is used to declare which channel you’ll be using for communication and also in most of our applications the structure of the message packet that each mote shall be sending. By default, the maximum packet size that one can send is 28 bytes but it can be modified to upto 127 bytes by changing the header file.

That’s it for this post, we’ll keep updating this space with more posts which’ll sort of act as a timeline of the experiments/projects we did till now in this field in the hope that it might be of use to anybody trying to work on similar projects using TinyOS.

Cheers!

Setting up TinyOS on Linux

The first step in our journey through the wondrous lands of Wireless Sensor Networks with TelosB and Micaz proved to be the most irritating and cumbersome one (for a linux n00b like me at least, I struggled for a fortnight with the setup -_- ).

Long story short, here’s the entire procedure given by Sachin.

This is what we follow for a fresh install, we are by no means saying this is the simplest or the only way to install TinyOS in Ubuntu, but we are kind of claiming its the most robust way we’ve come across.
Here’s the breakdown:
[For other people not to familiar with Linux, don’t copy the ‘$’ symbol, that just indicates you’re typing in terminal 😛 Ctrl+Alt+T to open terminal quickly by the way.]

Remove previously installed *-tinyos packages:

  • $ sudo dpkg -P `dpkg -l nesc ‘*tinyos*’ | grep ^ii | awk ‘{ print $2 }’ | xargs`
  • $ sudo apt-get clean

Edit sources.list:

Close the opened file. Now, back in terminal, use these commands

Rename the extracted tinyos directory tinyos-main and copy it into your home folder

Now, set up the tos environment

  • $ sudo gedit .bashrc

Add these lines to the end of the opened file :
[ ‘#’ is used to initiate comments]

  • # Here we setup the environment
  • # ‘<your_username>’ should be replaced with your own username
  • # like in my case its ‘sj’ so my ‘<your_username>’ is ‘sj’
  • # variables needed by the tinyos
  • # make system
  • export TOSROOT=“/home/users/<your_username>/tinyos-main“
  • export TOSDIR=”$TOSROOT/tos”
  • export CLASSPATH=$CLASSPATH:$TOSROOT/support/sdk/java
  • export MAKERULES=”$TOSROOT/support/make/Makerules”
  • export PYTHONPATH=$PYTHONPATH:$TOSROOT/support/sdk/python
  • echo “setting up TinyOS on source path $TOSROOT”

Close the file.
Restart terminal.

You’re done! 😀

Check your TinyOS install by:

  • $ cd ~/tinyos-main/apps/Blink
  • $ make telosb

The code should compile successfully and at the end of the compilation, the result would be similar to that of writing a tos-image.

Cheers!

WSN Intro

This is the area where I’ll be primarily posting about the things I’m learning about in the domain of Wireless Sensor Networks using TinyOS. I’m working alongside two close friends Laksh Bhatia and Sachin from college on development of a protocol stack for condition based maintenance in pipelines. As of now, we’re learning things step by step, primarily on UC Berkeley’s TelosB motes.

We started of with setting up TinyOS, then moved on to communicating between two motes, then small grids, getting console prints through serial communication etc. As of now, the latest thing we’re working on is implementing sleep wake TDM on a square 16 mote static grid. We’ll soon start posting detailed “walk-through”s, of sorts, of the entire journey and hope we can help people who’re just venturing into this field save themselves some time and frustration 🙂

Blink!

SONY DSC

Greetings.

So, I finally managed to motivate myself enough to get on with this blog. Stuff you can expect to see here regularly-

  • Arduino, Raspberry Pi related hacks
  • Regular posts related to an academic Wireless Sensor Networks project on UC-Berkeley’s TelosB motes using TinyOS
  • Photographs to show new techniques of photography that I’m trying or some of my old work
  • Drum Covers of some songs or hopefully some original compositions in the future

I seriously hope I get better at this along the way. It’ll be cool if the work I put up here helps some lost soul scouring the internet for a solution to some weird technical roadblock. It might just also be a source of some amusement to some shutterbug or wannabe-drummer.

I really don’t know how regular or how interesting I’ll be able to make this blog (I feel I’m really rusty in terms of writing) . If you’re reading this, do leave constructive criticism or stuff you would want me to talk about related to these fields.

Until the next post… 🙂

May the force be with you.